The Importance of Safe Depressurisation
In the European Union, non pressurised canisters can be recycled through the normal waste stream as non-hazardous products meaning that the extra costs associated with both hazardous waste disposal and dangerous goods transportation are significantly reduced. The first key step in the disposal process is to ensure that all non-refillable canisters are completely depleted of their contents. Even if a canister seems empty, residual gas can build up pressure, meaning that by puncturing or crushing the canister during disposal you can cause it to explode, posing a serious risk of injury and damage to property. Not only does proper depressurisation mitigate this risk, it also ensures the safe release of any gas content that could be potentially harmful.
Essential Tools for Depressurisation
Before you start to depressurise gas canisters, it is vital to ensure that you have the proper equipment to do so safely. This means ensuring that you have suitable protective glasses, clothing and a designated container for your empty canisters.
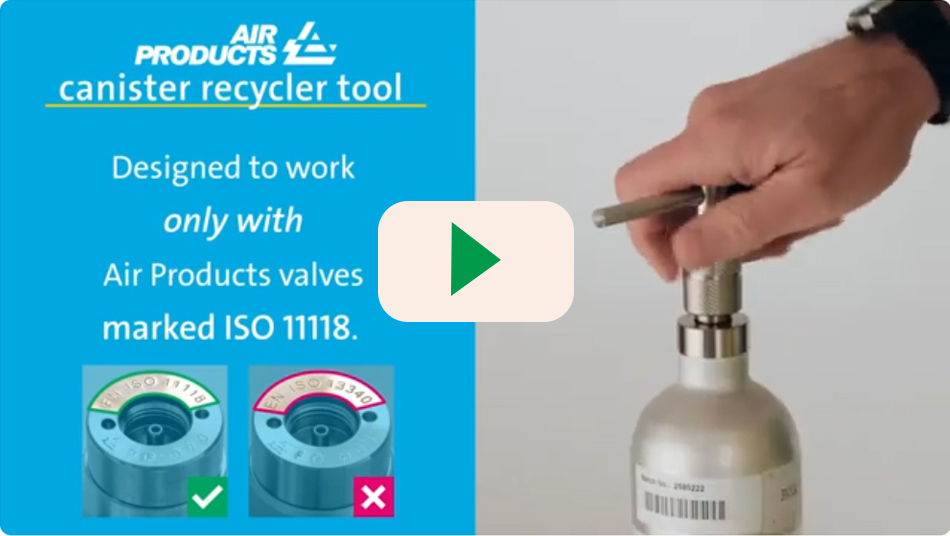
As well as the appropriate PPE, you will of course need an industry approved depressurisation tool. At Air Products, we offer two distinct canister recycler tools. The first, is our Low Torque Portable Recycler, designed to work with Air Products valves marked ISO 11118, it features a simple to use, portable construction meaning that it can be easily deployed in a range of settings. For other valve types and aerosol canisters the The Fixed Position Recycler should be used. The fixed position recycler tool makes a hole in the side of an empty canister so it cannot be reused and is designed to make Air Products 34L and 58L canisters and aerosols safe prior to recycling.
IMPORTANT: Never depressurise your canisters near any open flames and ensure that the depressurisation process is conducted in a well-ventilated area or outdoors to prevent the build-up of potentially harmful gases.

Step-by-step Guide to Depressurising Non-refillable Gas Canisters
Step 1: Identifying the Canister Type
The first step in depressurising non-refillable gas canisters is to identify the type of canister you are working with. Different types of canisters may have specific requirements for depressurisation and disposal.
- Check the packaging of the canister for any specific information or labelling regarding its contents and intended applications.
- Consult the manufacturer's instructions or guidelines for the canister to understand any specific requirements for depressurization.
- Consider the type of valve used on the canister.
By properly identifying the type of canister, you can ensure that the depressurisation process is carried out with the correct tool and in accordance with the specific requirements and waste packaging rules.
Step 2: Setting Up the Canister Recycler Tool
Once you have identified the type of canister, the next step is to set up the canister recycler tool for safe depressurisation.
- Refer to the manufacturer's instructions or maintenance guide for the canister recycler tool.
- Ensure that the canister recycler tool is in proper working condition and has been maintained according to the manufacturer's guidelines.
- Prepare a suitable container to collect any remaining contents or residues from the canister during depressurization.
Properly setting up the canister recycler tool ensures its safe and effective use during the depressurisation process.
Step 3: Connecting the Canister to the Recycler Tool
After setting up the canister recycler tool, the next step is to connect it to the canister.
- Ensure that the connection between the canister and the recycler tool is secure and properly sealed in an upright position.
- Begin carefully screwing the recycler tool into the valve at the top of the canister until it is fastened securely.
By connecting the canister to the recycler tool correctly, you can ensure the safe and effective depressurisation of the canister.
Step 4: Depressurising the Canister
To depressurise the canister safely, ensure it is securely attached to the recycler tool and start activating the tool to release any remaining gas slowly.
- Once securely fastened, begin turning the handle of the portable recycler tool to begin the depressurisation process.
- When using the canister recycling tool, you will hear the pin drop into the canister, indicating that the canister is depressurised.
- When the canister is completely depleted, slowly begin unwinding the canister tool and unscrewing it from the canister valve.
Monitor the process closely to prevent accidents. Once depressurised, disconnect the canister carefully and store it in a suitable container.
Step 5: Ensuring Complete Depressurisation
Ensuring complete depressurisation is crucial to avoid any residual pressure risks. Check for any hissing sounds or signs of gas escaping. Utilise appropriate tools to release any remaining pressure safely. Ventilate the area adequately to disperse any lingering gas. Finally, verify that the canister feels light and displays no pressure indications. Always handle depressurised canisters with care to prevent accidents.
Canister Disposal
Now that your canisters are correctly depressurised, they are ready for disposal or recycling. Remember to always consult relevant regulatory guidelines and consider engaging with waste management professionals for proper canister disposal. You can learn more about safe canister disposal by clicking the button below.